
Imagine you own a restaurant, local business, agency, clinic, or service-based company, and you have already created a clean WordPress website with PressMeGPT.
Your website may already have the important pages visitors need, such as:
- – Home
- – About
- – Services
- – Contact
Now, you want to add a dedicated Blog page where you can publish helpful articles, updates, tutorials, tips, and industry-related content.
For example, if you run a restaurant, you could publish blog posts about menu updates, food trends, recipes, event announcements, or local dining tips. If you run a service business, you could publish guides that answer common customer questions and bring more visitors to your website through search engines.
The good news is that adding a blog page to your WordPress website is simple.
You do not need to rebuild your site. You do not need to install a new theme. You do not need to write any code.
All you need to do is:
- Create a new page called Blog
- Set that page as your WordPress Posts page
- Add the Blog page to your website menu
- Start publishing blog posts
In this guide, we will show you how to add a blog page to your WordPress website created with PressMeGPT.
What Is a Blog Page in WordPress?
A blog page is a page on your website where WordPress displays your blog posts.
This page does not work like a normal page where you manually add all the content. Instead, WordPress automatically uses it to show your latest posts.
For example, if you create posts like:
- – 5 Tips for Choosing the Right Restaurant
- – How to Plan a Perfect Family Dinner
- – Best Seasonal Dishes to Try This Month
WordPress can automatically display those posts on your Blog page.
This makes it easy for visitors to find your latest content in one place.
Why Add a Blog Page to Your WordPress Website?
Adding a blog page is useful for almost every type of website.
A blog can help you:
- – Share helpful content with your audience
- – Answer customer questions
- – Improve your website’s SEO
- – Bring more visitors from Google
- – Build trust with potential customers
- – Keep your website fresh and updated
- – Promote your services, products, or offers
For business websites created with PressMeGPT, a blog page is a great way to turn a simple website into a content-driven website that attracts visitors over time.
How To Add a Blog Page on Your WordPress Website
Follow the steps below to create and display a blog page on your WordPress website.
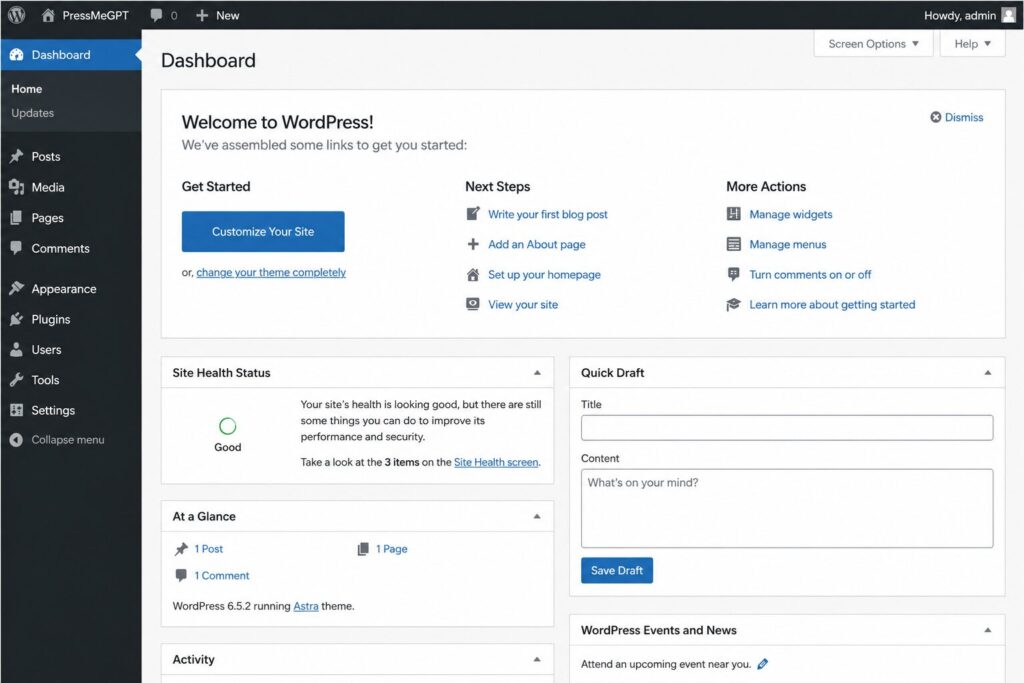
Step 1: Log In to Your WordPress Admin Dashboard
First, log in to your WordPress admin dashboard.
You can usually access it by adding /wp-admin at the end of your website URL.
For example:
yourwebsite.com/wp-admin
Enter your username and password, then click Log In.
Once you are inside the dashboard, you will see the main WordPress admin area.
Step 2: Create a New Blog Page
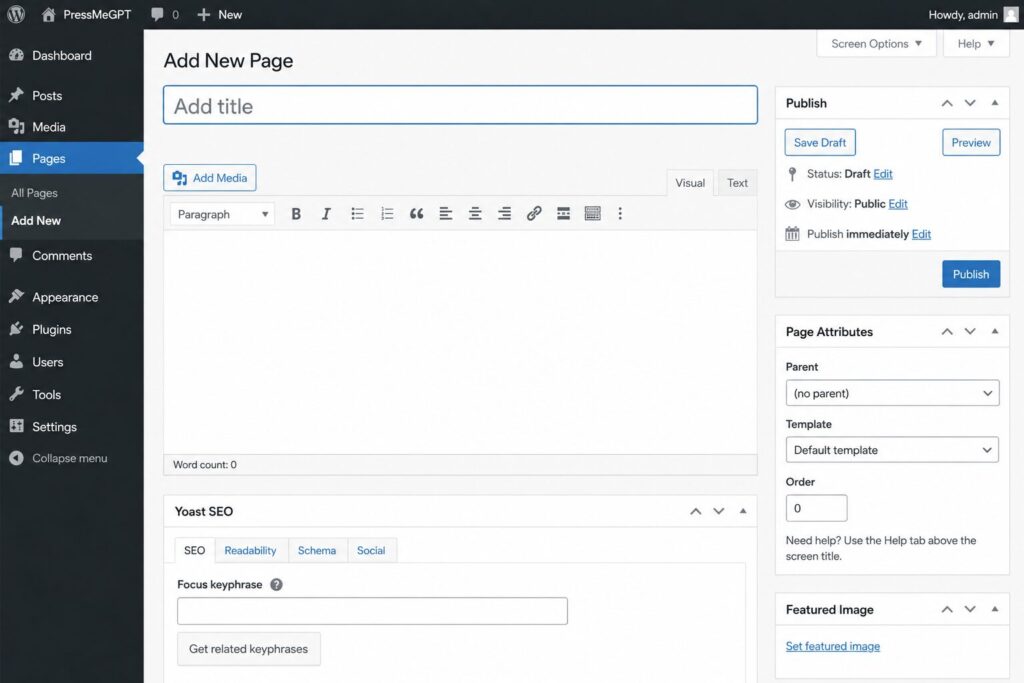
Now you need to create a new page that will be used as your blog page.
From your WordPress dashboard, go to:
Pages → Add New
This will open the WordPress page editor.
Step 3: Add the Page Title
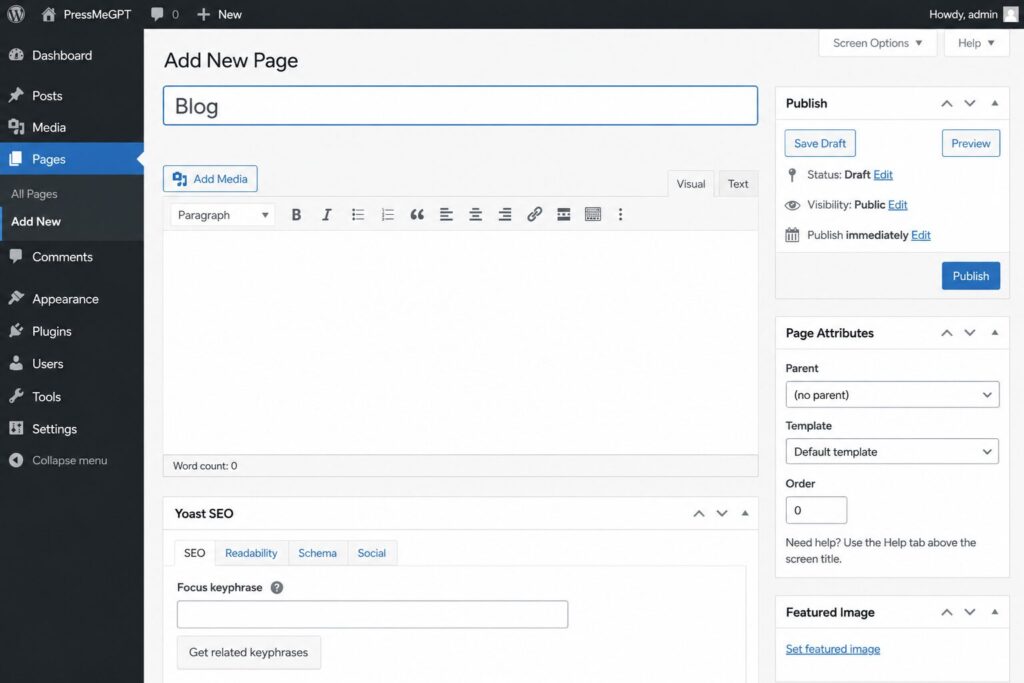
In the page title field, enter:
Blog
You can also use another title if you prefer, such as:
- – Latest Updates
- – Articles
- – News
- – Resources
However, for most websites, Blog is the simplest and clearest option.
You do not need to add any content to this page. WordPress will automatically use this page to display your blog posts after you select it as the Posts page.
Step 4: Publish the Blog Page
After adding the title, click the Publish button.
WordPress may ask you to confirm publishing. Click Publish again if needed.
Your Blog page is now created, but it will not display your posts yet. To make it work as the main blog page, you need to select it as your Posts page in WordPress settings.
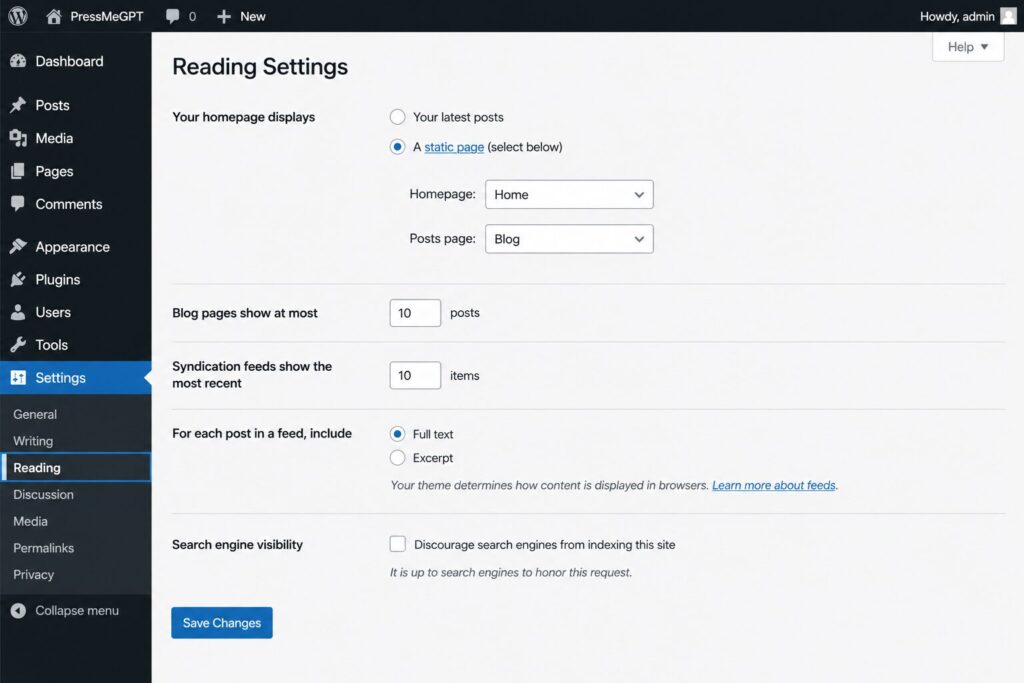
Step 5: Open WordPress Reading Settings
Next, go back to your WordPress dashboard.
From the left sidebar, go to:
Settings → Reading
The Reading settings control how your homepage and blog posts are displayed on your website.
Step 6: Select Your Blog Page as the Posts Page
Inside the Reading settings, look for the section called:
Your homepage displays
If your website uses a custom homepage, select:
A static page
Then you will see two dropdown options:
- – Homepage
- – Posts page
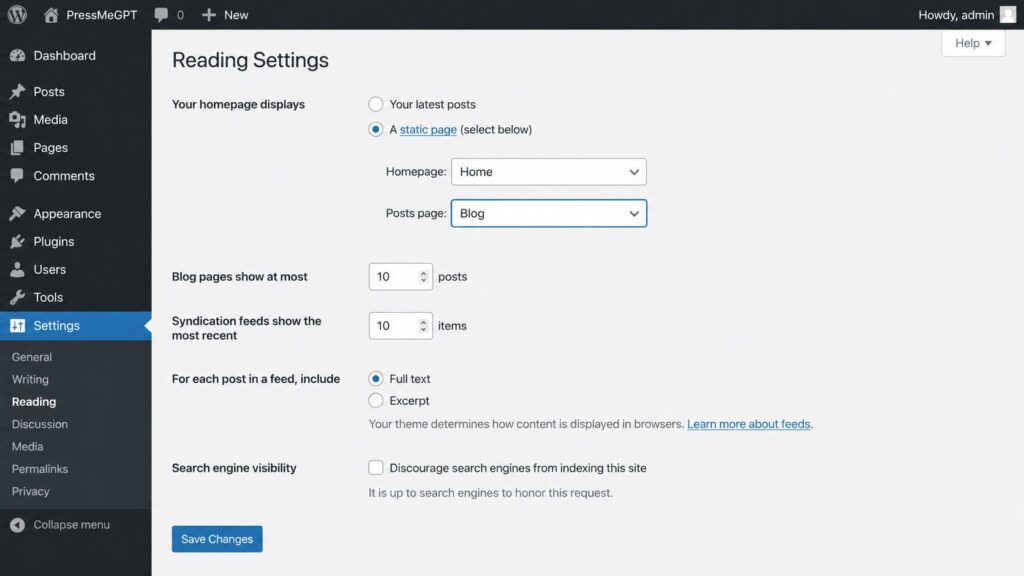
For the Homepage dropdown, select your website’s homepage.
For the Posts page dropdown, select the page you just created:
Blog
This tells WordPress to display your blog posts on the Blog page.
Step 7: Save Your Reading Settings
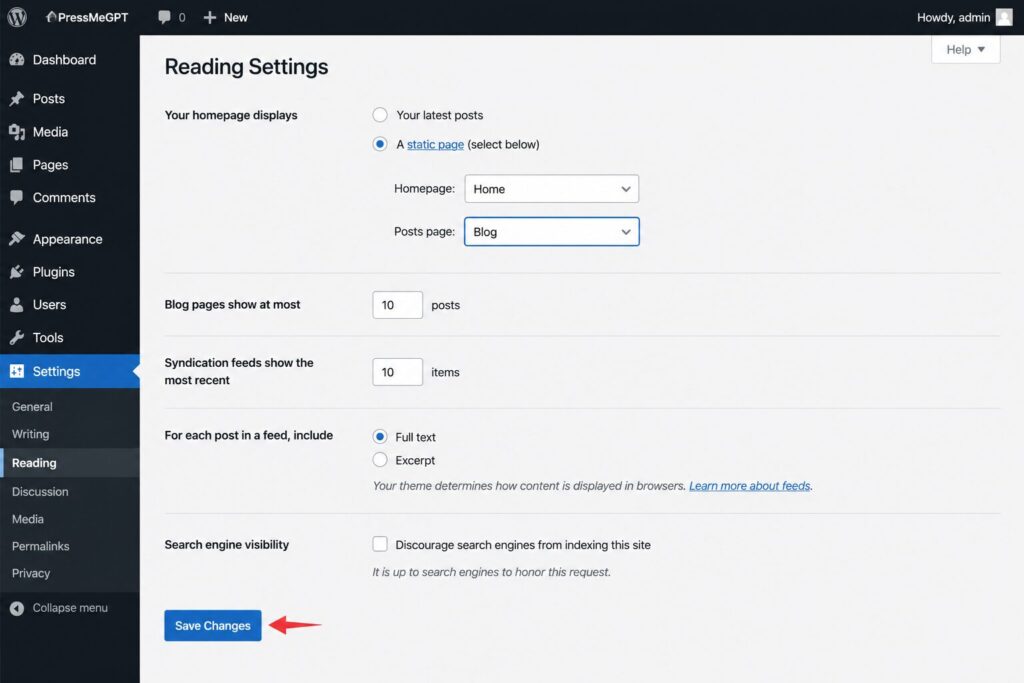
After selecting the Blog page as your Posts page, scroll down and click:
Save Changes
Now WordPress knows that your Blog page should display your latest posts.
If you already have blog posts published, they will appear on this page. If your website is new and does not have posts yet, the page may look empty until you publish your first blog post.
Step 8: Add the Blog Page to Your Website Menu
Now that your Blog page is created and assigned as the Posts page, you need to make it visible to visitors.
To do that, add it to your website menu.
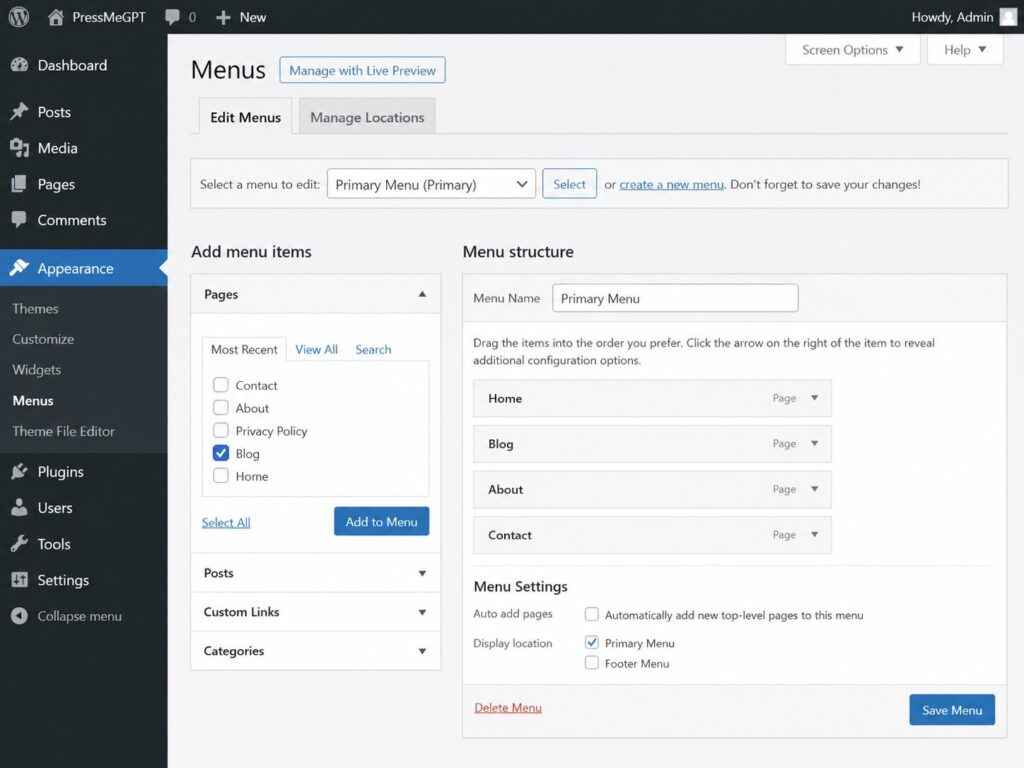
From your WordPress dashboard, go to:
Appearance → Menus
Depending on your theme or WordPress setup, your menu settings may also be managed under:
Appearance → Editor
If your website uses the classic menu system, follow the steps below.
Step 9: Select the Blog Page
In the menu editor, look for the Pages section.
Click View All to see all available pages.
Find the page called Blog, check the box next to it, and click:
Add to Menu
Your Blog page will now appear in the menu structure.
Step 10: Save the Menu
Once the Blog page has been added to the menu, click:
Save Menu
This will update your website navigation.
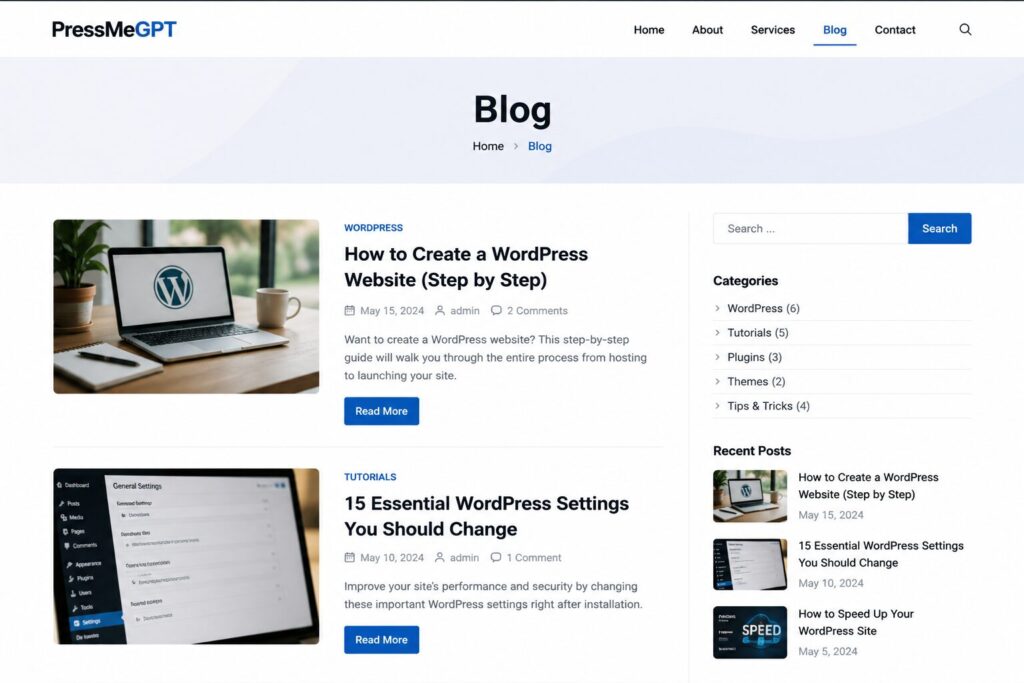
Now visitors will be able to see the Blog link in your website header or navigation menu.
Step 11: Visit Your Website and Check the Blog Page
Now visit your website from the front end.
Look at your website header menu and click on Blog.
If everything is set up correctly, you will land on your Blog page.
If you already have posts, they will appear there. If you do not have posts yet, you can create your first post by going to:
Posts → Add New
How To Add Your First Blog Post in WordPress
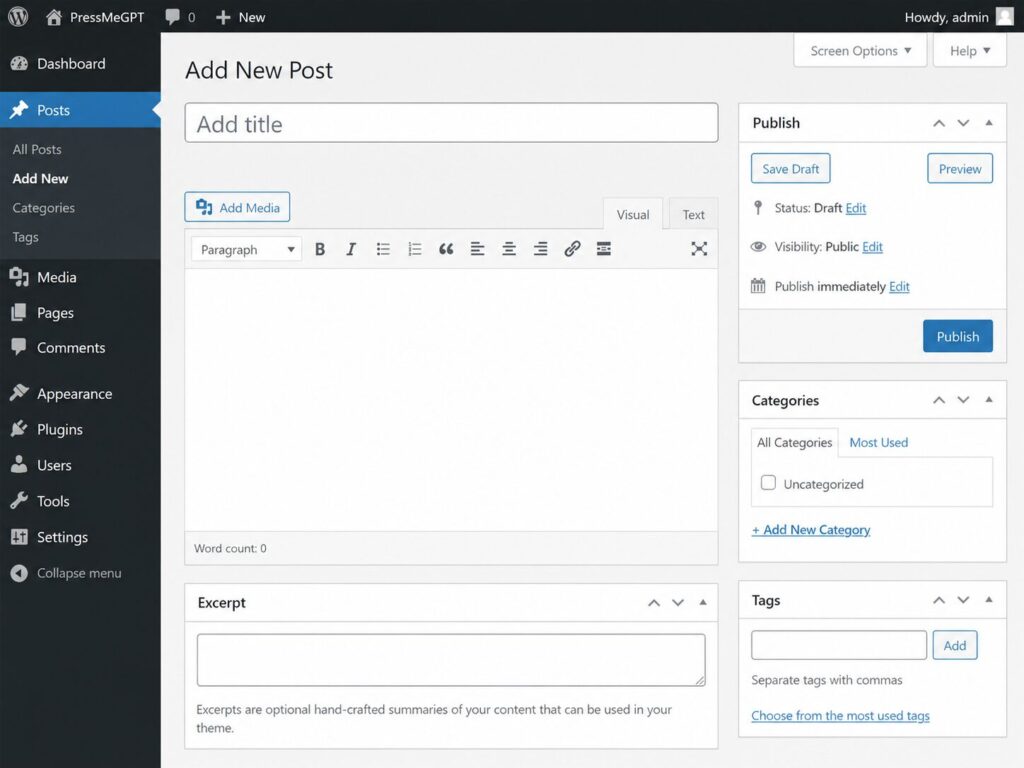
After creating your Blog page, you can start publishing posts.
To add a new blog post, go to:
Posts → Add New
Then add your blog post title and content.
For example, if you run a restaurant website, your first post could be:
Top 5 Dishes to Try at Our Restaurant This Month
Add your content, images, category, and featured image. Then click Publish.
Once published, the post will automatically appear on your Blog page.
What If Your Blog Page Looks Empty?
If your Blog page looks empty, do not worry.
This usually happens when you have not published any blog posts yet.
To fix this, create at least one post by going to:
Posts → Add New
After publishing your first post, visit the Blog page again. Your post should now appear there.
Can You Customize the Blog Page Design?
Yes.
The layout of your Blog page depends on your WordPress theme.
Your theme controls how blog posts are displayed, including:
- – Post layout
- – Featured image size
- – Blog grid style
- – Typography
- – Spacing
- – Sidebar settings
- – Read more button style
If your website was created with PressMeGPT, your site design may already include a clean blog layout based on your selected theme and website structure.
You can also customize your blog page further using your theme settings, WordPress editor, or additional design tools.
Common Mistakes to Avoid
When adding a Blog page to WordPress, avoid these common mistakes:
1. Creating a Blog Page but Not Setting It as the Posts Page
If you only create a page called Blog, WordPress will not automatically show posts there.
You must go to Settings → Reading and select Blog as the Posts page.
2. Forgetting to Add the Blog Page to the Menu
If the Blog page is not added to your menu, visitors may not be able to find it easily.
Always add the Blog page to your website navigation.
3. Adding Manual Content to the Blog Page
The Blog page should usually stay empty because WordPress uses it to display posts automatically.
If you want to customize the blog layout, use your theme settings or editor options instead.
4. Not Publishing Any Posts
Your Blog page will not show much until you publish blog posts.
Create at least one post to test how your Blog page looks.
Final Thoughts
Adding a blog page to your WordPress website is one of the easiest ways to make your site more useful, searchable, and engaging.
If you created your website with PressMeGPT, you can quickly add a dedicated Blog page by creating a new page, selecting it as your Posts page in WordPress Reading settings, and adding it to your website menu.
Once your Blog page is live, you can start publishing helpful content for your audience.
Whether you run a restaurant, agency, local service business, online store, or professional website, a blog can help you attract more visitors, answer customer questions, and grow your online presence.
With WordPress and PressMeGPT, setting up your blog page only takes a few minutes.